How to carve a Block O pumpkin like this master
From dragons to Disney gigs, pumpkin pro Gus Smithhisler brings artistry, humor and heart to every squash he sculpts. Now he’s sharing tips to help your Block O pumpkin stand out.
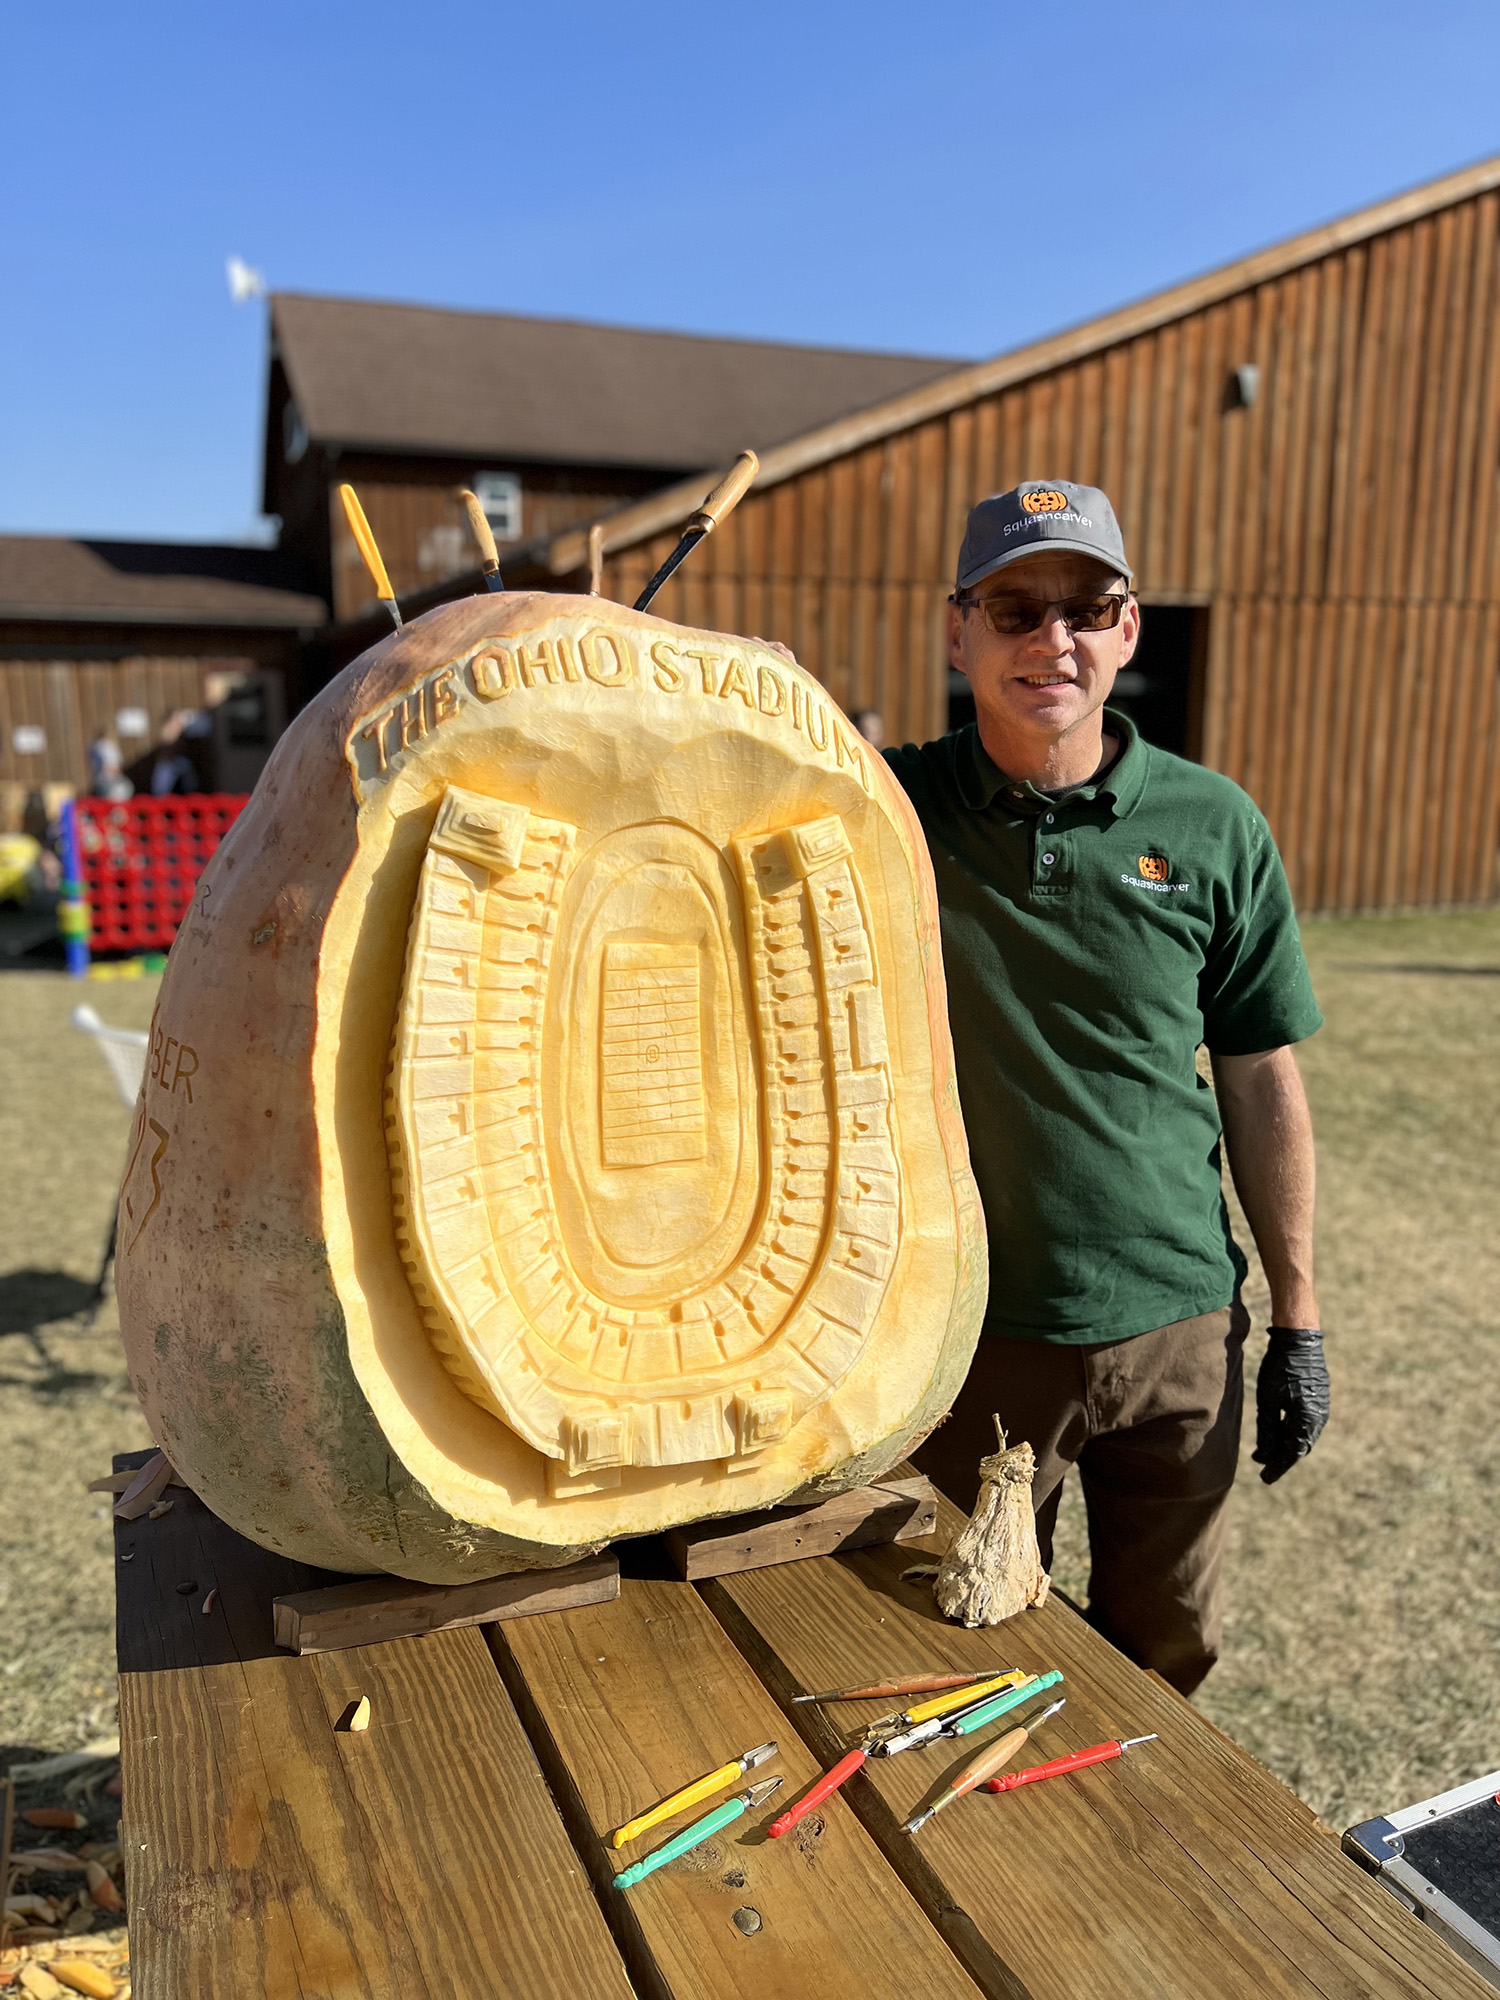


You could call Gus Smithhisler ’90, ’94 a people pleaser. In his 32 years at the Ohio Department of Natural Resources, he built pedestrian bridges and improved parking lots and restrooms at state parks—among dozens of projects to make Ohio work better for residents. “Being in public service, you get used to doing things for other people, and I truly enjoy that,” the civil engineer says. “I truly enjoyed making things better for the people.”
Now retired from that, he carves giant pumpkins for live audiences. As he sculpts, he explains his process, tells jokes, shares surprising trivia and spreads good cheer. So you can also call him a performance artist, a blade master or simply the “Squashcarver.”
That’s the name of the business he runs with his wife, Holly Van Tilburg Smithhisler ’05. They work with the likes of the Columbus Zoo and Aquarium, Disney, Starbucks, the “Halloween” movie franchise and mega-videogame-maker Electronic Arts (better known as EA Games), and they get so many requests for weekends in October that they can’t accept every opportunity. Smithhisler has traveled as far as Las Vegas and Japan to carve, and turns often-lumpy squashes into dragons, lions, Jack Hanna, the ’Shoe—anything really. He rarely repeats a design.
Here, the veteran artisan shares tips and tricks so you can create a better Block O.
Instructions
When Smithhisler carves a pumpkin, he doesn’t push all the way through the flesh. He sculpts just the outside, regardless of whether his pumpkin fits in his hands or tops 2,000 pounds. For this one, he cautions that achieving the straight lines of a Block O on the bumpy pumpkin face can be more challenging than you’d expect. So set your expectations accordingly. [Photos, Jodi Miller (1-5), courtesy of Smithhisler (6)]
1.
Start with a clean, dry, stably placed pumpkin. To draw the pattern, Smithhisler says, dry-erase markers work well. He uses a pencil-like crayon. Isopropyl alcohol can act as an eraser if you need it; concentrations above 90 percent are best. Smithhisler starts with the center of the O—straight edges and slanted corners—then makes the outer edge the same width from the inner O on all sides. Use a stencil if freehand drawing is not your thing.

2.
You’re not going to hollow this pumpkin out. Your first knife step is shallowly carving along your lines. Smithhisler prefers a sharp filet knife for its flexibility and control. He has never cut himself while working a pumpkin because he uses his dominant hand to guide the knife and his other to push. But for this smaller pumpkin, he must use his left hand to help stabilize it. Still, the idea is to never cut toward your hand. Don’t be afraid to set your pumpkin on its side at any point if that makes it easier to carve.

3.
Now you’re going to scrape off the skin between the lines. Start at the edges and work inward, in short strokes. Here, Smithhisler uses a clay sculpting loop tool. It is sharp enough to remove pumpkin, but not so sharp that it cuts fingers. (That makes it a good choice for child carvers.) Keep going until your lighter layer is as smooth as you’d like it to be. You can choose to stop here and skip to step 5.

4.
Smithhisler next free-carves a line around the Block O and one inside the middle. You can draw these first and follow with your knife or a V-shape clay loop. Other ways to add to your Block O include carving “Ohio State” across the center—going deeper into the pumpkin, just don’t push all the way through—or adding a buckeye and leaves.

5.
Vigorously spray the front of the pumpkin with alcohol—90 percent concentration or above. This kills the bacteria your fingers left and removes moisture. Both will make your pumpkin last longer. Pumpkins rot from the inside out, so because you didn’t totally penetrate the flesh, your pumpkin will last longer than a traditional jack-o’-lantern already.

6.
Want to light it from the inside? Smithhisler says to carve early and show off your pumpkin as is until it gets close to the night you want it aglow. Then carve off the bottom—not the stem. Put your light there and set the pumpkin over it. You should be able to see the light through the light layer, but if it’s not bright enough, simply remove layers until you like it, from the inside or the outside.

Need some Buckeye stencils?
The Ohio State University Alumni Association is sharing Buckeye-themed pumpkin stencils that include Brutus, Script Ohio and a buckeye leaf. Follow this link to request the downloadable files.


